That Soft Look
Another question popped up. This time it was about the soft look you sometimes can see on my photographs. And, of course, it's one of many manipulations in Photoshop, which I am going to talk about in this article.
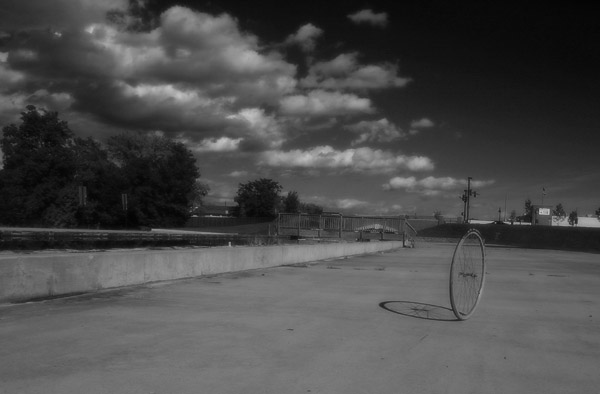
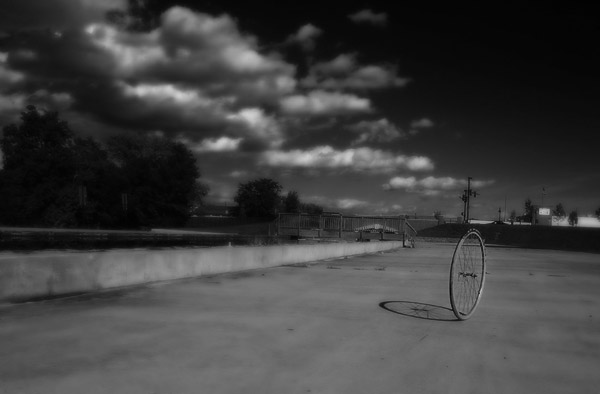
Here is the original image which I am going to use as an example in the following manipulations:

Simple Blur Layer
First let's create this soft look that gives kind of a misty feeling and mood. This soft look works very well for portraits of people, I would even say for the ladies. It removes blemishes and softens the wrinkles, as well it is very suitable to they nature and pleasant to our eyes.
To create such a soft look you have to create a layer with a copy of the image atop of the original image and apply some blur filter, and changing the opacity of the layer you control the softness. So here are the steps:
- Drag the Background layer (the layer of the image) on to the icon
 , which is at the bottom of the layer tab,
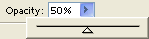
 - Change the opacity of the layer to 50% (for starters)
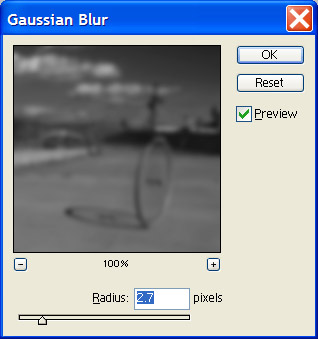
- Select in menu: Filter, Blur, Gaussian Blur
- In the dialog set the radius (I set it as 2.7, but it greatly depends on the size of the image and the effect you want to achieve)
- Click OK to apply the filter
- Adjust the opacity as you want the soft look to be (as shown below):
This was the very basic approach to achieve the soft look, but the following sections will tell you how to use the soft look as a magnet to the eye, which will draw the eye to the subject or/and the eyes.
~ Top ~Thickening the blur to borders
Our next step is to make the soft look uneven, so it would become thicker to the borders and thus drawing the attention into the frame, preventing the eye to leave the photograph. To do so we will use elliptical marquee and feathering to create a mask for the blur layer.
Here are the steps you should take to achieve it:
- Create a mask for the blur layer by clicking on the icon
 , which is at the bottom of the layer tab
 - Select elliptical marquee in the toolbar,
- Use the marquee to select an area within the frame (as shown below):

- Select in menu: Selection, Feather or press Ctrl-Alt-D
- The following dialog will popup:
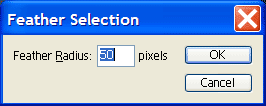
- Set the radius somewhere between 50-250 (it depends on the size of the image and the size of the selected area mostly)
Note: Sometimes the radius you set is too large, so the application cannot show any selected pixels. It will tell you by showing a message. Then Undo the last command (feathering) and repeat it with a smaller radius. - After the feather is applied the selected area will shrink, it happens because the edges of the selection will be very smooth (gradient) and the application shows the selection only for pixels that more than 50% selected
- Set the foreground color to dark gray (something like this:
 )
) - Make sure that the layer mask is active by clicking on it once,
- Fill the selection on the layer mask with the color (press Alt-Backspace)
- Remove selection by pressing Ctrl-D
- As the result of the operations I got the following image (you should have something similar):

You may want to increase opacity of the blur layer to thicken the blur on the borders and softing the main subject.
~ Top ~Let The Eyes See
Sometimes you want to remove blur for small parts of the image. It could be the eyes of the subject, or some other part where the utmost attention is required. It could be done easily, just select a brush in the toolbar (better if the brush would be with soft edges), set the foreground color to pure black and just paint on the layer mask over the part you want to be clear.
In my case I would have the layer tab look like this:
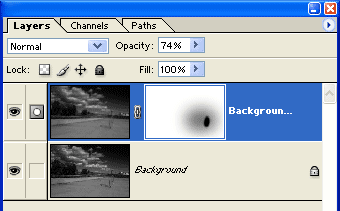
Where the small black dot on the mask is what I painted with the brush.
~ Top ~Contrast Tweak
The final section of this article covers some interesting manipulation, which I discovered by playing with Photoshop. It's very simple but it could add that missing touch to the photograph.
First let's take a look at the final image:
At first glance the result looks like I adjusted the contrast to the image. It's correct by only in one part. I adjusted the contrast, but only to the blur layer. It sunken the dark areas in even deeper shadows and brought up more of the highlighted areas. But the main point here is that even very strong contrast applied to the blur layer will not remove the details from the image, and it creates spots of light and shadow within the frame. The thing is that the blurred layer doesn't have fine details; it's more about spots of light and shadows, so by changing the contrast you accentuate those areas and attract more attention to them, without loosing the details. As well it a bit enhances this misty mood of the image.
So here are those simple steps:
- Click on the icon with the image on that blur layer to make sure that it's active,
- Create and new Curve adjustment layer by clicking on the icon
 , which is at the bottom of the layer tab, and selecting the Curves in the menu
 - Adjust the curve line by dragging the points on the line similar as shown below:
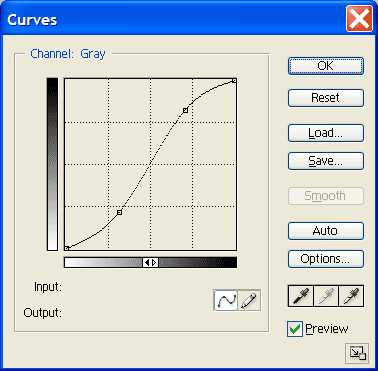
- Click OK to create the Curves layer
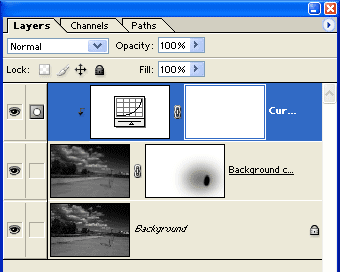
- Press Ctrl-G to tie the adjustments only to the Blur layer
- You should get the following layer stack:
Well, that's it. I've done with my article and you have new techniques to create new looks for your images. Have fun. ![[end of the text]](http://www.romanzolin.com/img/misc/text_end.png "End of the article")


- Font size:


