Basic Light Patterns
In this article I will provide you with some diagrams of light patterns and its brief descriptions. The intention of this article is to introduce these names and light setups, which you will encounter among photographers.
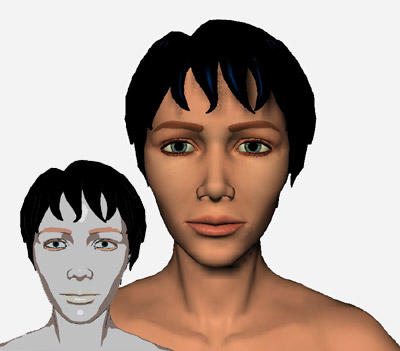
Butterfly
This probably is one of the most used light pattern and I would say the easiest ones. The light is placed above the camera but closer to the subject, so there is a small shadow under the nose of the person. The shape of the shadow could remind you a butterfly, which gave the name to the light pattern. This light pattern could be combined with short lighting (see below). When using the pattern don't forget to let the in the eye sockets of the subject, it will make nice eye catchlights.
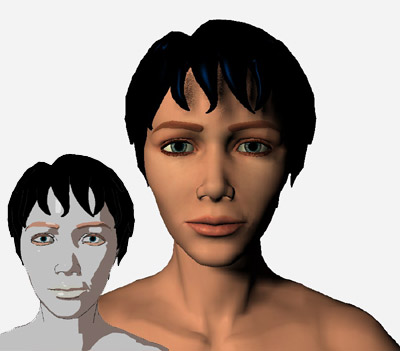
Loop
With this light pattern you create a small loop-like shadow on either side of the nose. It is achieved by placing the main light source above the camera (almost like with Butterfly pattern) and moving it slightly to a side. Just watch for the changes in the nose shadow and don't forget cast some light into the eye sockets. The light pattern will create the results as shown below in the image:
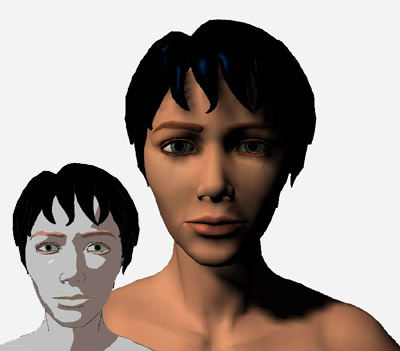
Rembrandt
This light pattern was named because of the great master, who often used the light pattern in his portraits. The general idea of the pattern is to create a small upside-down triangle on the opposite to the light cheek on the subject's face. This is a very flattering pattern (especially for people with prominent cheekbone structure) and was often used in old Hollywood portraits. And as usual watch for the catchlights in both eyes. To create this pattern you have move the main light source closer to the subjects face and to the side and a bit above the eye level. You have to play with the light a bit to ensure that there is a definite triangle on the subject's cheek as well the light reaches the both eyes.
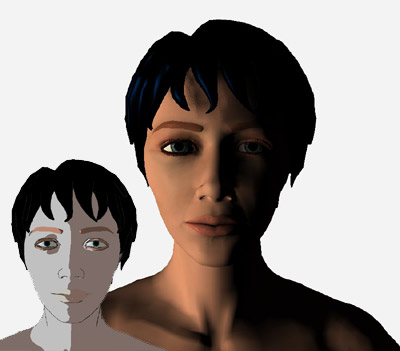
Split Lighting
This is very simple pattern and often used for dramatic results, so don't over use it in your studio. The concept is reflected by the name - you split the subject's face with the light. So only half of the face is lit by the light, the other half lays in the shadow. As you understand, the main light source is placed way to the side of the subject and almost on the same plane as the subject's head.
Broad Lighting
Here I want to say not a particular light pattern, but somewhat a combination of light patterns with subject's and main light's orientation to the camera. As you noticed, all light patterns were shown for a full face view. When you turn the subject's face to 3/4 view you have two choices to place the main light, which will create different effects. Broad lighting will create an effect of a broad face, because the wider [visible] part of the face, neck and shoulders will be lit and as such more prominent in the photograph. This approach is flattering mostly for slim and thin people, don't use it with heavy people, it will produce the opposite effect.
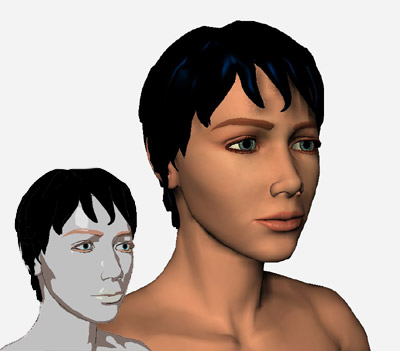
To achieve this effect you have to place the main light to the opposite side from the direction of the subject's face. So if the subject looks to your left (to the camera's left) - as shown below - you place the main light to your (camera's) right or very close to the camera.
Short Lighting
This approach is opposite to the broad lighting and achieves opposite results, it reduces the visible part of the subject's face, neck and shoulders that are lit by the main light. As the result, the heavy people with such approach seem thinner, which creates a flattering effect.
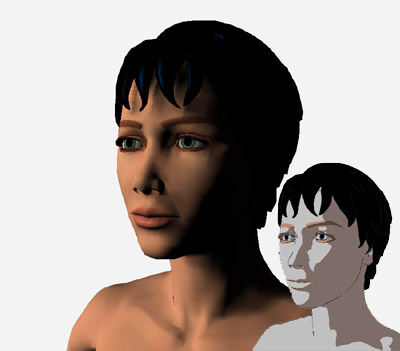
The diagram below shows the main light placement in relation to the camera and the subject. In contrary to the broad
lighting the main light is placed in front of the subject's face (butterfly light pattern is often used with this approach.
![[end of the text]](http://www.romanzolin.com/img/misc/text_end.png "End of the article")
~ Top ~


- Font size:


