Converting into Black and White
I was asked a question "How do you convert a photograph into BW?" Of course, we are talking about Photoshop and digital darkroom techniques. The simplest way is to use Mode, Grayscale. But there are several approaches that could be used to achieve different results. And these approaches I am going to cover in this article.
The choice are:
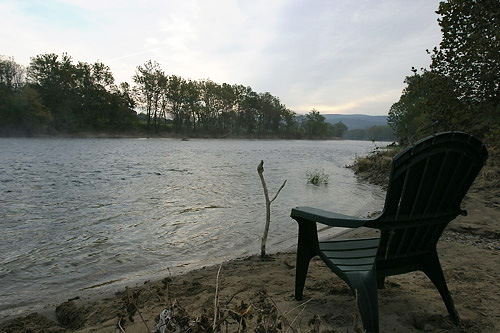
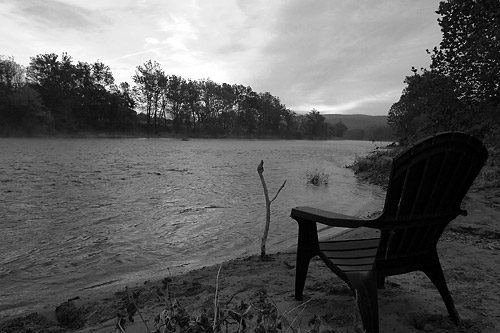
Let's start with the original photograph that I want to play with:
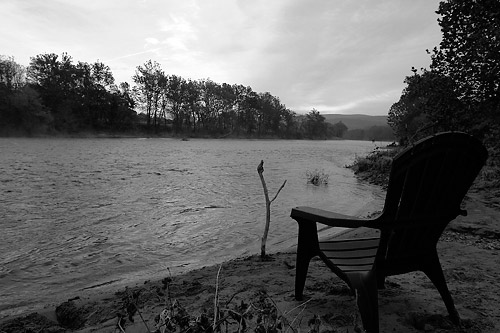
Simple Grayscale
To achieve the result shown on the right you have to do a very simple operation - in menu select Image, Mode, Grayscale. You do almost nothing, and the result image is not pleasant. The contrast is a bit lower and for me the image is a kind of dull one and uninteresting. Of course, you may adjust curves and levels to make it better, but how much better could you do it? May be we should try another approach of converting it into BW?

Channel Mixer
It's another very popular approach to create BW images from color ones. It requires some knowledge about channels and gives you a nice tool to tweak the tones of the final BW image. The original image, which I decided to torture, has nice clouds that I wanted to emphasize and give them even more depth. The sky here is the most highlighted area and mostly it's based on blue colors. It would be good here to apply red filter, but I don't have one.
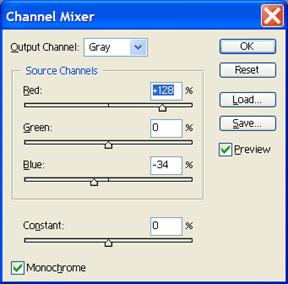
But we can use a virtual filter and we do it like this:
- Select in menu: Image, Adjustments, Channel Mixer,
- Check the Monochrome box,
- In the dialog (on the left) increase the Reds,
- Reduce the Blues to compensate the Reds,
Note: the sum of all channel values should be close to 100% - Click OK to apply the changes
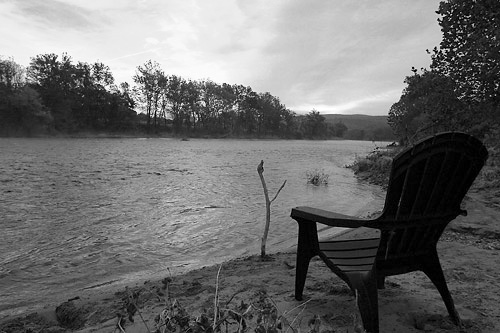
What we got is a nice BW image with accentuated clouds and not too dark front. Sometimes it's enough and you may consider the work to be done. But if the result and your mood tell you to try something else, then the next approache may help you out.
~ Top ~Single Channel
There is one more simple method to get nice clouds in black and white photograph - extract the Red channel. The results could vary from beautiful to frustrating. The reason lies in the noise and dramatically reduced number of "quality" pixels. First of all noise. As you may know the red channel is the one, which greatly exposed to noise in digital photography. And all that noise is going to popup in you BW picture. The second part is that by extracting a channel (any channel) you lose all those details in other two thirds that constitute the image. That's why the quality of the image will be reduced, but such sacrifices could be made to achieve great skies in a small image (by reducing the image you reduce the visible defects).
And finally to extract the channel you should do the following:
- Go to the Channels tab,
- Click on the channel (Red as shown in the dialog above),
- Select in menu: Image, Mode, Grayscale,
- In a popup dialog confirm that you want to discard the other channels.
As you see the result (for this size) aren't much different from the Channel Mixer approach.
Lab mode and Lightness
I use this approach almost all the time, because it's relatively easy and I have a nice contrasty image, which could be published right away. The only drawback of this approach - there is not accentuated blues (sky and clouds). And with this method you don't loose much data, the discarded layers have much less data than the channels in RGB mode.
So the steps are the following:
- Switch to Lab mode by selecting in menu: Image, Mode, Lab,
- Go to Channels tab
- Select the channel Lightness as shown in the dialog above,
- Select in menu: Image, Mode, Grayscale,
- In a popup dialog confirm that you want to discard the other channels.
Calculations
With this approach you may play for a long time and get very diffrent results. As you can see on the dialog to the left there are a lot of options and settings to play with. My way here is to select the channels I want to emphasize and adjust the rest to get a better image. Here I selected two Red channels with burned Blue channel as a mask. There is an option to use even different images for each of the channels and the mask, but I never did it.

I will leave alone with the dialog so you could just play with it without any smart words and complex advices (which I don't know). By the way, to open the dialog you need to select in menu: Image, Calculations. The result of the settings you see on the dialog is shown below:

You can notice that the tones of the river in the photograph have lost it contrast if comparing with other BW results. So you should watch for such subtleties
and choose the best. ![[end of the text]](http://www.romanzolin.com/img/misc/text_end.png "End of the article")


- Font size:


