Thumbnails With Shadows
Recently I was asked how to create those thumbnails with shadows, which you can see in the galleries. The technique is not too complicated, and I am going to explain what you have to do to get similar results.
For starters lets create a single pixel border around the image:
1. Open your image and make sure that it doesn't have any borders

2. Set your background color into the color of our border
3. Alt-I, S (menu: Image, Canvas Size) - open canvas dialog
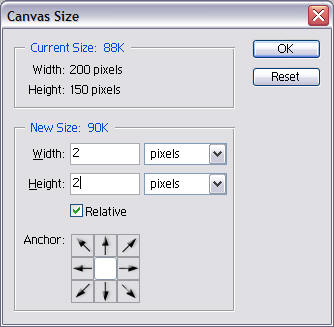
4. Set the parameters as shown above
5. Press "OK" - you will get a single pixel border around your image

Now I will create the shadow for a white background (as it is on my website)
1. We use the same image with the one pixel border
2. Click twice on the background layer with your image
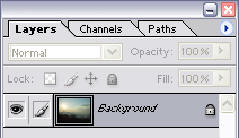
3. In the appeared dialog click "OK" to remove the lock from the layer
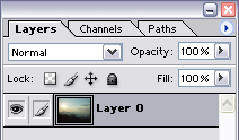
4. Create a new layer by pressing button " ![]() "
"
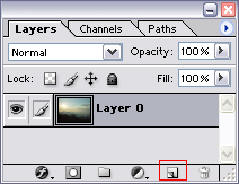
5. Move the newly created layer into the bottom of the stack
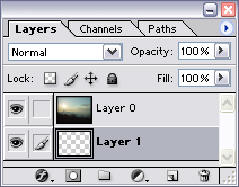
6. Alt-I, S (menu: Image, Canvas size) - open canvas dialog
7. Set parameters as shown below, don't forget to click on the left upper square in the table at the bottom of the dialog
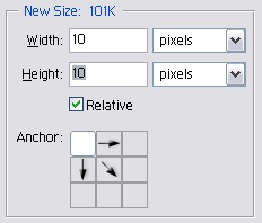
8. Click "OK" - you will get an empty space at left and bottom of the image

9. Make sure that your empty layer is active (selected as shown above)
10. Set the foreground color in Photoshop, so it will match the background color where the image will be placed (in my case it is White)
11. Alt-Backspace - to fill out the empty background layer
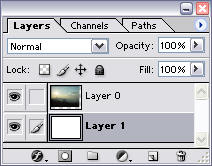
12. Double click on the layer with the image to get the dialog with layer parameters
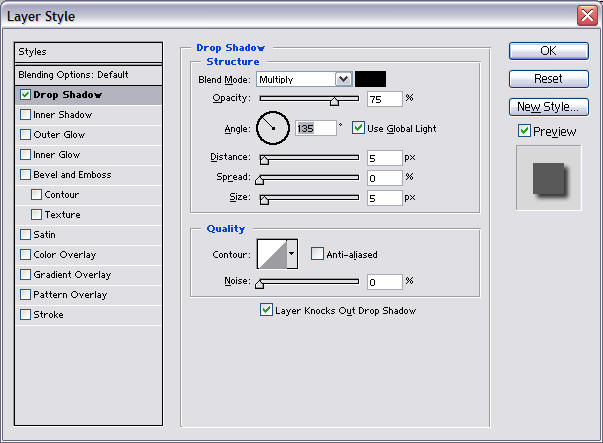
13. Select and check the "Drop Shadow" and set the parameters as shown above
14. Press "OK" - you will get the image with the shadow atop of a layer with your background color:
15. Ctrl-Alt-Shift-S (menu: File, Save for Web) - to save the image for you web site.
Good luck! ![End of the article [end of the text]](http://www.romanzolin.com/img/misc/text_end.png)


