Selection - Color Range
On this page I want to describe how you can select a part of the picture based on a specific color(s). It helps a lot when you want to select this sky for further modifications. This technique is very simple and that's what makes it a good one. You don't need any meticulous work to select pixels and the selections is more exact (has a better quality).
I use Photoshop 7 (CS at this moment), so the menu elements used here may vary from other versions.
Let's start. Assume that we have the following picture (see below)
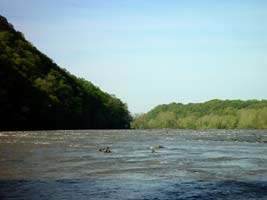
Further I want to select the sky. If you ever tried to select complex surfaces/areas as forest, hair and etc, then you know that how tiresome it can be. But in this case the color of the sky is dramatically differs from the color of the trees, that's why we ought to use the color selection.
To do it, go to main menu: Selection, Color range. You have to see the dialog shown below:
I would like to bring your attention to the following elements of the dialog: dropdown list "Select", "Fuzziness" and Eyedropper (shown within the red box).
- In the dropdown list you select "palette" of colors to use in this selection. Use "Sampled Colors" to select the colors of the image
- Fuzziness - is a level of selection for adjoining color(s) to specified one, the higher the level the more colors will be covered by the selection.
- Eyedropper - a set of modes for the eyedropper to select, add or remove a color from the selection. By default the left mode is set (to select a single color). Middle mode allows you to add colors to the selection, the right one to remove.
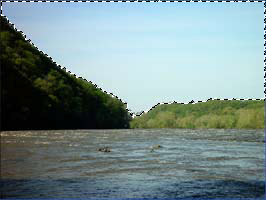
To select the sky I first used the left mode and then the middle one. I moved the eyedropper through the sky meanwhile holding the left mouse button, the results you can see on the image below:
As you can see some colors, which don't belong to the sky (but to water) was selected as well. There are two ways to handle it: leave the selection and clear it out later or try to correct it here. I prefer to combine these two: reduce "the fuzziness" and later deselect "the garbage"
Now if you click OK you will see that Photoshop selected these pixels, which were colored by white in the dialog above. To remove "the garbage" select "Lasso Tool" and change the mode to "Subtract from selection" ![]() Then select the pixels you want to remove (the garbage) and they will be removed from the selection.
Then select the pixels you want to remove (the garbage) and they will be removed from the selection.
At this moment we have completed selection of the sky and you can proceed to further operations upon it. ![[end of the text]](http://www.romanzolin.com/img/misc/text_end.png "End of the article")
~ Top ~


- Font size:


